April 25, 2012

Blog Makeover!!!


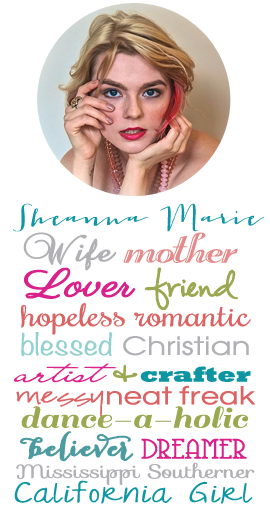
I’m getting another makeover!!...Well, my blog is, and I can’t wait! All of you wonderful people that wish to continue to keep up with me will soon be able to  easier than ever.  The lovely & talented Katie Price of Priceless Design Studios is designing my new layout and it should be up and runnin’ in about another week and a half.

In the mean time here are my social media links , Let’s Connect!


And more about Katie:

First off I was introduced to Katie through Jillian Hart, another blogger who I keep up with and admire who works in social media marketing who I inquired to redesign my blog. Jillian in turn recommended Katie.

I reviewed Katies’ blog, design portfolio , policies , & pricing. Needless to say I was impressed; not only with her work, clear and fair policies, and pricing but her prompt response time! WOW! Katie is on top of it. She is truly professional and makes you feel secure in your transaction with her.

Sneek Peek:

Here is a lil’ bit of the inspirations for the upcoming design  
color scheme insperations
this blog is a fashion forward fav
Aunie Sauce

lovely and inspirational blog I personally follow
Two Men and a Mommy

love the art inspired design
Hello Hue

super sleek & infoemative
Graphic Design Confessions

Love the colorful design and wow! you have to check out their recopies
Our Best Bites
Calming art inspired design with always awesomely beautiful photos
Sketch and Wash

I LOVE each and every one of these blogs and happily subscribe and keep up with each one and they have provided me with a wealth of information and inspiration. I suggest you check them out.


April 20, 2012

Cover The Night

4/20 hey hey, you know what that means!! 
YOLO, COVER THE NIGHT

I am in full support of this movement and have even created some pics for download so that you can get involved to. CLICK HERE  and feel free to download, copy, re-post, & re-print any of my photos to show your support for the  Invisible Children. For more information on this project check out my  blog post here.


April 14, 2012

April 11, 2012

Custom Shoes 101


Shoe Customization 101

So.. you just couldn’t do it could you
In a recent post I helped you Know When To Break Up..With Your Shoes.
If you found that there were a couple pairs that you just couldn’t break-up with but are lookin’ a lil’ shabby maybe it’s time to give those babes a makeover!

I have a pair I had only worn once, they are comfy, AND they are Steve Madden’s
The silky material on the top part of the shoe had become picked & scuffed from a night out dancing.

So here is what I did.(EGORE, PAINT..BRUSHES..HURRY!! MUAHAHAHA)

1st I cleaned the entire shoe very very well. It is really important to work on a clean surface because, like with any paint job,  if you paint over the dirt n grime when it falls off..so will your nice paint job L

2nd I primed my shoe with a Black Gesso over the tops of my shoes (you can also use a black acrylic, gesso is matte & acrylic is glossy, your choice) I also used a damp rag to dab some of the gesso over the glitter of my heels, not necessary I just liked the way it looked. (make sure you have a small detail brush handy for those tight spots)


3rd I chose a metallic gold acrylic, to match the glitter already on my shoe, and again with a damp rag dabbed it into the acrylic and applied it atop the gesso in a circular motion working quickly but carefully to create a sheer coat over the entire material part of the shoe. (gave my pumps a great leather like look)

4th I black gessoed the soles of my shoes to prep the surface for a custom paint job.

5th I decided on a design and used a soft pastel/charcoal to sketch the design (you can also use a transfer paper like carbon paper)

6th I painted!

7th Sealer! MUST MUST MUST seal your shoes with a matte or gloss multi purpose sealer or all your work will have been in vain.

8th let dry for at least 24hrs THEN SHOW OFF YOUR ONE OF A KIND KICKS!

April 3, 2012

Under 5$ Spring Craft


Spring Is Here!

It's time to smell the roses...or whatever you prefer.
Here is an awesome project you can do with the young'ns for about $3

I picked up:1 terracotta pot
1 package of seeds- whatever your fancy
1 bag of potting soil
(all from the 99cent store)
for each kido 

Like some of you I already had paint and brushes layin’ around the house as well as some (dollar tree) shallow plastic bowls.

I picked out 5 colors of acrylic paint & placed a little in each bowl.

I gave each kid a paint brush and set them up outside with some water to rise their brushes and let them design their own flower pot.

Let the paint dry over night… the next day you can spray a clear coat, such as Krylon, over the artistic masterpieces.

After another 24 hrs place in your potting soil and follow your seed package instructions.

Enjoy